Beckham Brothers FLEXCOR SPC LVP And Vinyl Installation Guides
Click here to download this guide as a PDF, and click here to browse our Beckham Brothers LVP products.
INSTALLATION GUIDE Luxury Vinyl Plank
Note: it is important to read the instructions prior to installation. improper installation will void your warranty.
! IMPORTANT NOTICE !
AFTER INSTALLATION, MAKE SURE TO KEEP THE ROOM TEMPERATURE RANGE OF -60°C TO +60°C AS EXCESSIVELY HIGH OR LOW TEMPERATURES MAY CAUSE THIS PRODUCT TO EXPAND OR CONTRACT AND LEAD TO VISUAL DEFECTS OF THE FLOOR THAT WILL NOT BE WARRANTED.
- Calculate the room surface prior to installation and plan an extra 10% of flooring for cutting waste. For best results, make sure to always work from two (2) to three (3) cartons at a time, mixing the plants during installation.
- ACCLIMATION Big Ben Plus SPC is required to acclimate to the environment in which it will be used prior to installation. Keep boxes flat and level. Do not store boxes on their sides. During acclimation, heat and air conditioning should be functional to maintain a temperature between 5°C to 60°C. Only allow temperature changes after installation is fully completed.
- For floor surfaces exceeding 4,000 ft2 or 370 m2, and/or lengths exceeding 80 ft/18m use expansion mouldings.
- Inspect your sub-floor before you begin. It must be clean and level to 3/16 in / 4.76mm within a 10 ft. span. Big Ben Plus SPC can only be installed over a fully fastened substrate or properly cured concrete. Maximum deflection should be no more than 3/64 in / 1.1mm.
- Although this floor is waterproof, it is not aimed to be used as a moisture barrier. The sub-floor must be dry (max 2.5% moisture content — CM method). This product is also not to be installed in areas that have a risk of flooding such as saunas or outdoor areas.
- When installing on cement, it is necessary to create a moisture barrier using polyethylene film with a thickness of 6mil (0.2mm). Overlap the edges of the polyethylene by a minimum of 8” (20cm) and seal the junction with moisture-proof, self adhesive tape to prevent moisture from seeping through, which could create residue and swelling on your flooring surface.
- If this flooring is intended to be installed over an existing wooden floor, it is recommended to repair any loose boards or squeaks before you begin the installation.
- Do not install kitchen cabinets or island directly over SPC flooring.
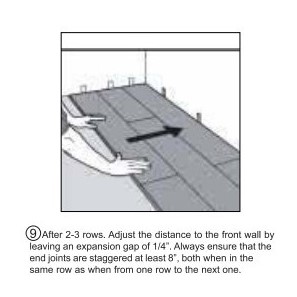
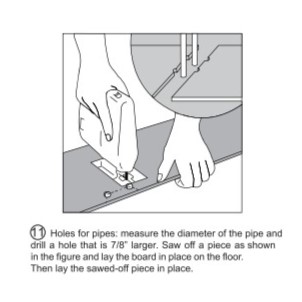
- With a floating floor, you must always ensure you leave a 1/4” gap between walls and fixtures such as pipes and pillars, stairs, etc. These gaps will be covered with trim moldings after the floor is installed. TIP: When installing around pipes, drill the holes 3/4” larger than the diameter of the pipes.
- Decide the installation direction. It is recommended to install the length direction of the planks parallel to the main light direction.
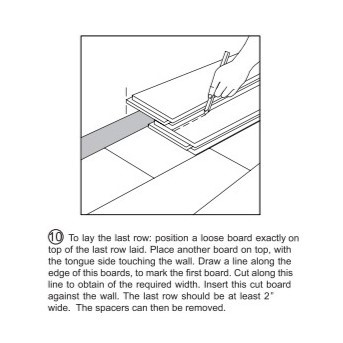
- Measure the area to be installed: the board with of the last row shall not be less than 2”. If so, adjust the width of the first row to be installed. In narrow hallways, it is recommended to install the floor parallel to the length of the hall.
- Inspect each individual plank one by one before installation. No claims on surface defects will be accepted after installation.
- Due to the speed of sudden temperature changes, which has potential to negatively affect this flooring, it is not recommended to install over any electrical radiant heating system. Installation over electrical radiant heating systems will not be covered by the manufacturer’s warranty. Below instructions are for radiant heating systems using water.
DO NOT USE THIS PRODUCT OVER ELECTRIC COIL HEATER
Ensure the radiant heat surface temperature never exceeds 60°C. Before installing over newly constructed radiant heat systems, operate the system at maximum capacity to force any residual moisture from the cementitious topping of the radiant heat system. The maximum moisture content of the screed is 1.5% (CM method). Shut down the floor heating at least 48 hours prior installation.
- It is recommended that the radiant heat be applied in a gradual manner after installing the floor. Refer to the radiant heat system’s manufacturer recommendations for additional guidance.
Tools and supplies required
- Spacers
- Rubber Mallet
- Ruler
- Pencil
- Tape Measure
- Utility Knife
